Using style customization, you can create a uniform ThoughtSpot experience that matches with your company’s look and feel. To re-brand the interface, you can use the style customization option found in the Admin Console in the ThoughtSpot web application. It lets you change the logo, application background color, chart color palettes, and footer text. For help with chart and table visualization fonts, contact ThoughtSpot Support.
This is especially useful if you’re using the ThoughtSpot APIs for embedding visualizations from ThoughtSpot in your own web portal or application. You can make the visualizations match the look and feel of the portal or application in which they are embedded. For more information on using the APIs, see the ThoughtSpot Application Integration Guide.
Change style customization
Make changes to the style of your ThoughtSpot interface in the Style Customization page. This option gives you defined, yet impactful capabilities for re-branding the interface, so having some understanding of typography and color schemes would be helpful.
To re-brand the interface:
-
Log in to ThoughtSpot from a browser.
-
Navigate to the Admin Console by clicking on the Admin tab from the top navigation bar. Select Style Customization from the side navigation bar that appears. To enable style customization, you must add
?customBrandingEnabled=trueto the end of your URL.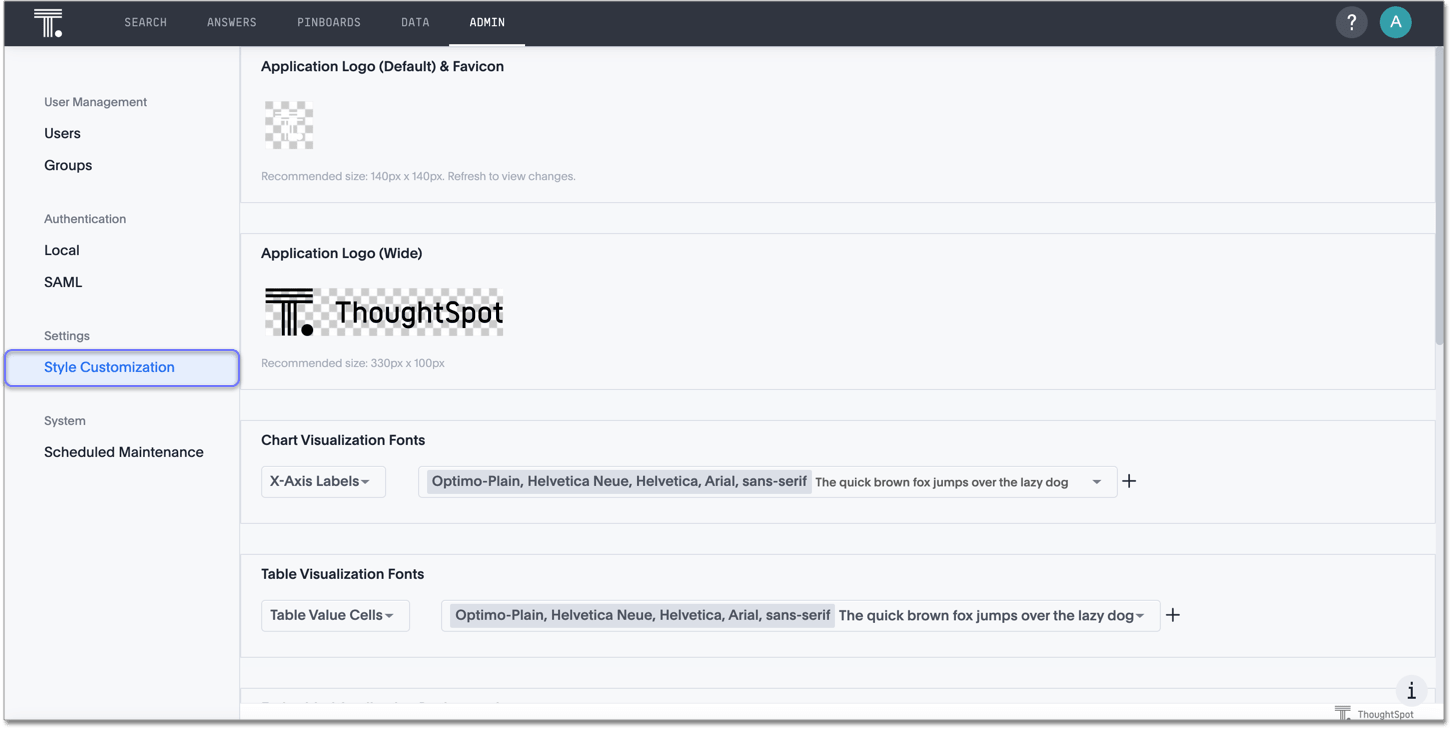
In the Style Customization page, you can perform the following actions:
Upload application logos
You can replace the ThoughtSpot logo, wherever it appears in the ThoughtSpot web application, with your own company logo. To upload a new logo, follow these steps:
-
Add
?customBrandingEnabled=trueto the end of your URL. -
Click the default icon under Application Logo (Default) to browse for and select your own default logo.

Your icon image should be a square, and the recommended size is 140px by 140px. The accepted file formats are jpg, jpeg, and png. This logo will appear on the top left of the interface.
-
Click the wide icon under Application Logo (Wide) to browse for and select your own wide logo.

The recommended size is 330px by 100px. The accepted file formats are jpg, jpeg, and png. This logo appears on the login screen. You may need to test a few versions to make sure it appears correctly.
-
To bring back the default logos, click the Reset button on the upper right hand side of the sections.
Set chart and table visualization fonts
You can add and edit fonts to customize the appearance of your charts and tables. To customize fonts, follow these steps:
-
Add
?customBrandingEnabled=trueto the end of your URL. -
Click the Add New button under Chart Visualization Fonts.

- In the add new font menu, select the details for the font:
-
Upload your custom font.
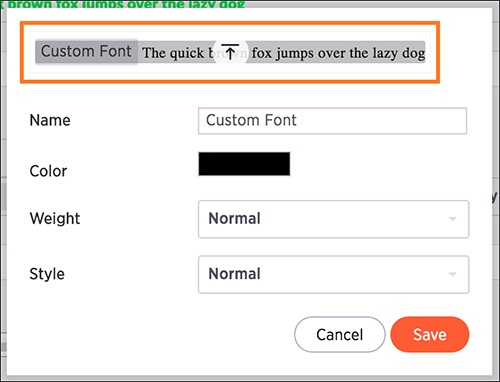
Only WOFF font types are supported.
-
Use the color menu to choose the font color.
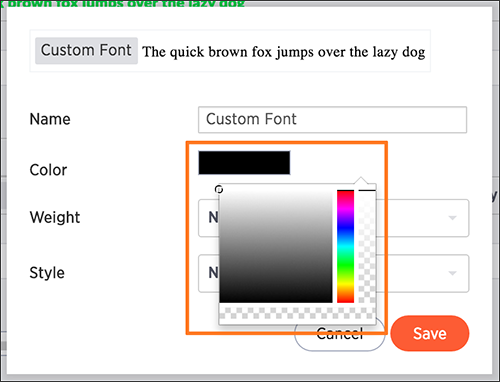
-
Choose the font weight and style from the drop down menus.
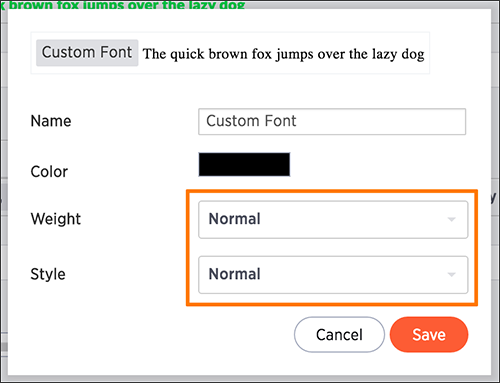
The font weight choices are normal, bold, and light. The style choices are normal, italic, and oblique.
-
Click Save.
-
-
Click the Edit Font icon
 to make changes to the font you just uploaded or to a pre-existing font.
- Make any changes to the details of the font in the edit menu and click Save.
-
Click the custom font drop down to choose your custom font.

-
Click the chart label drop down to choose where you would like to apply your custom font.
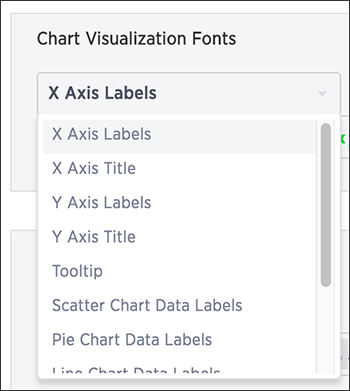
-
The same steps can be followed to set your Table Visualization Fonts.

- To bring back the default fonts, click the Reset button on the upper right hand side of the sections.
Choose a background color
You can customize ThoughtSpot’s background color to match your company’s theme. The custom background color is in effect when using the API to embed visualizations and Liveboards.
This feature is only applicable when embedding ThoughtSpot in an external web portal or application. To customize the background color, follow these steps:
-
Add
?customBrandingEnabled=trueto the end of your URL. -
Click the background color box under Application Background.

-
Use the color menu to choose your new background color.
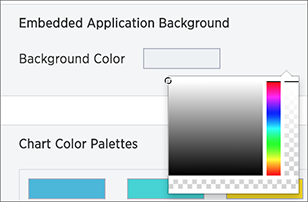
-
To bring back the default color, click the Reset button on the upper right hand side of the section.
Select chart color palettes
You can change the color palettes that are used to create your charts. To customize the color palettes, follow these steps:
-
Add
?customBrandingEnabled=trueto the end of your URL. -
Click the color you would like to change in the primary color palette, and use the color menu to choose your new color. You can also add a HEX color number directly.
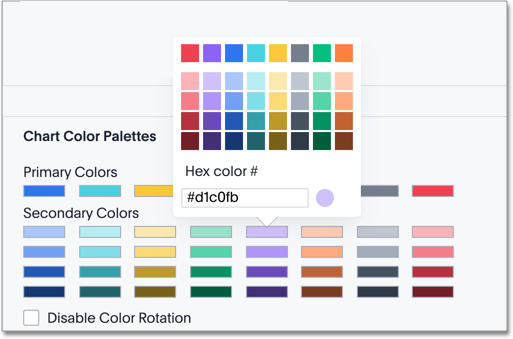
All of the colors in the primary color palette are used in a chart before any from the secondary palette are used. Therefore, the primary palette usually consists of primary colors.
-
Click the color you would like to change in the secondary color palette, and use the color menu to choose your new color. You can also add a HEX color number directly.
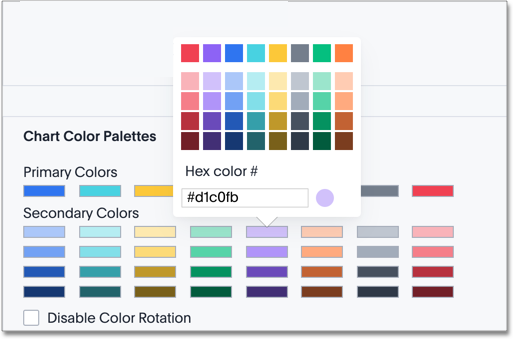
The colors from the secondary color palette are used after all of the colors have been exhausted from the primary palette. Therefore, the secondary palette usually consists of secondary colors.
-
To bring back the default color palettes, click the Reset button on the upper right hand side of the section.
Disable color rotation
You can disable color rotation for single-color charts. If you disable color rotation, ThoughtSpot generates single-color charts in the order of your color palette, left to right. If you leave color rotation enabled, ThoughtSpot generates the color of single-color charts randomly.
Change the footer text
You can customize ThoughtSpot’s footer text to add a company-specific message. To add new footer text, follow these steps:
-
Add
?customBrandingEnabled=trueto the end of your URL. - Click the text box under Footer text.
-
Enter your new text message.
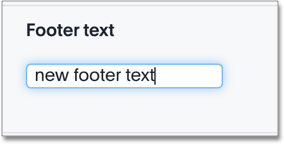
Your new text message will automatically be displayed in the footer.

- To bring back the default footer text, click the Reset button on the upper right hand side of the section.